


The impact screen is the one part of your simulator that takes a direct hit on every single shot.
It is both the surface you play golf into and the screen your course is projected onto, so it has to survive ball speed after ball speed while still showing a crisp, bright image. Get it right and it disappears into the experience. Get it wrong and you notice the noise, the bounce-back or the soft picture every time you swing.
This guide explains what a golf simulator impact screen is made of, how to choose the aspect ratio, how to size it to your room, and how to pair it with your projector so the whole setup looks and feels right.
When you are ready to compare hardware, browse our golf impact screens and golf simulator projectors.
A good impact screen comes down to five things: the fabric construction, the image format, the finished dimensions, the required clearance in front and behind, and the projector setup. Choose the material for the intended use and the format for your available width, height and projected image. Neither layer count nor aspect ratio alone determines the right screen.
What an Impact Screen Actually Does
An impact screen does two jobs at once, and both have to be done well. It absorbs the energy of the ball on every shot, and it displays the projected image of your course or range. Compare both impact performance and projection quality for the actual model.
Because it is hit constantly, an impact screen is a wear item chosen for durability first, then image quality. That is what separates a purpose-built golf screen from an ordinary projector screen, which is not designed to withstand golf-ball impacts. The right screen quietly takes the hit, controls the ball, and shows a clean picture, shot after shot.
An impact screen is a golf surface first and a display second. Judge it on how it handles ball speed and noise, then on image quality, not the other way around.
Screen Materials and Layers
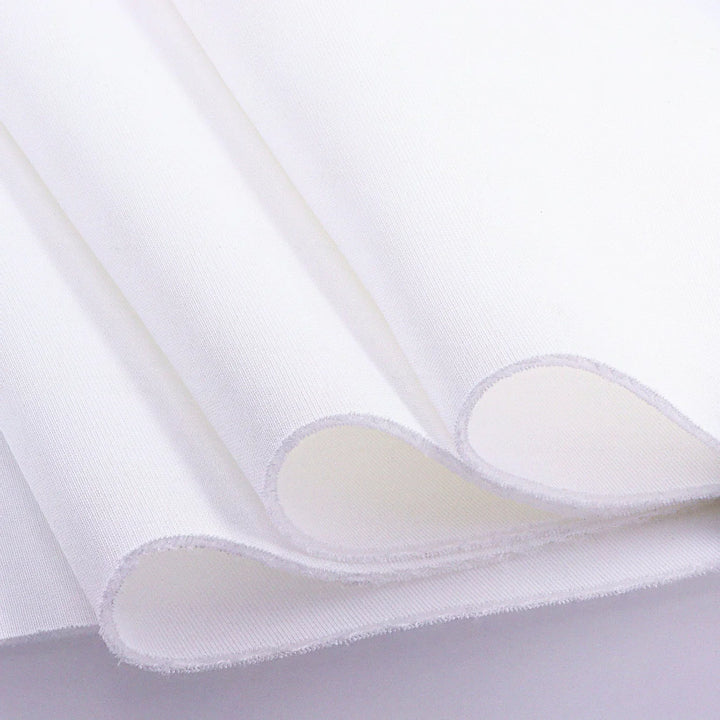
Impact screens commonly use woven or knitted synthetic fabrics. Compare the fabric construction, intended ball speeds, projection surface and installation requirements. Layer count is one useful detail, but does not by itself establish durability, noise or rebound performance.
Single-layer screens
Single-layer screens can offer a simpler, more affordable solution. Suitability for regular play or driver shots depends on the particular fabric and the manufacturer’s specifications, rather than the layer count alone.
Multi-layer screens
Multi-layer constructions can incorporate material designed to absorb impact and reduce noise. Performance still depends on the fabric, construction and installation. Compare the actual screen’s projection surface, intended use and care instructions rather than assuming that more layers guarantee a longer life.
| Option from our range | Use to consider | Compatibility and ordering checks |
|---|---|---|
| Premium Custom Golf Impact Screen | Made-to-measure installations; triple-layer polyester with a choice of finishes | Confirm finished dimensions, projection area, borders and fixing method |
| Net Return Golf Impact Screen | Add projection to a compatible Net Return setup | Select the version for your exact frame; net and projector are not included |
| TGN-7 Impact Screen Simulator | Screen add-on for the TGN-7 golf net | TGN-7 net and frame sold separately; check current availability |
| Premium Foam Panels & Screen Package | A coordinated screen and protective-panel installation | Confirm the selected package dimensions, included components and installation requirements |
Check the manufacturer’s intended use and any ball-speed limits for the exact screen. Installation, tension, rear clearance and ball condition matter alongside the material.
Aspect Ratio: 4:3 vs 16:9
Aspect ratio is the shape of the image, and it is one of the first decisions to make because it ties your screen, projector and software together. The two you will see most are 4:3 and 16:9, with 16:10 as a middle ground.
When 4:3 fits
At a given width, a 4:3 image is taller than a 16:9 image. This can make good use of a room with limited width and available height. The view of the ball’s flight depends on the simulator software and camera settings, not the screen shape alone.
When 16:9 or 16:10 fits
A 16:9 or 16:10 image can work well when the room provides sufficient width, whether it is used only for golf or also for films and sport. At equal width, 16:10 provides a little more image height than 16:9. Choose the proportions that fit the usable screen area and intended content.
| Ratio | Shape at equal width | Projector setup | Use to consider |
|---|---|---|---|
| 4:3 | Taller image | Native or configured 4:3 output | Rooms where width is limited relative to height |
| 16:10 | Between 4:3 and 16:9 in height | Native or configured 16:10 output | Golf or mixed use, according to available dimensions |
| 16:9 | Wide, cinematic | Native or configured 16:9 output | Dedicated golf or multi-use rooms with sufficient width |
Match the displayed image to the usable screen area. The projector’s native ratio does not have to be identical: suitable 16:9 or 16:10 projectors can display a configured 4:3 image. Check supported resolutions, software settings and the resulting image size; an unsuitable configuration can leave unused areas or crop the image.
Sizing the Screen to Your Space
Plan the screen and enclosure together, allowing room for fixings, padding and the specified screen movement. Side and overhead protection should account for off-centre shots.
Before ordering, distinguish three measurements: the screen’s finished outer dimensions including borders or pockets, its usable projection area, and the frame’s inner opening and overall dimensions. Confirm which dimensions the supplier asks you to provide.
Width, height and depth all interact, so it is best to plan the screen alongside the room from the start. Our golf simulator room size guide explains exactly how to measure width, depth and ceiling height before you commit to a screen.
The mat raises the ball, the enclosure frame and padding take space around the screen, and the projected image needs to fit the screen exactly. Always plan the screen, enclosure and room together.
Ball Speed, Durability and Safe Distance
How long a screen lasts and how safe it feels depend on three things working together: the quality of the screen, the ball-to-screen distance, and how the screen is tensioned.
Plan two separate clearances: the manufacturer’s recommended distance from ball to screen, and the free space behind the screen needed for it to deflect. The screen must not strike a wall or rigid object on impact. Protect exposed frame sections and allow for off-centre shots. Confirm these distances for the chosen screen and mounting system before installation.
Follow the screen’s fixing and tensioning instructions. Aim for an even projection surface with the movement needed to absorb impact; excessive tension can increase rebound and stress on the fabric and fixings.
Framed, Enclosed or DIY?
How you mount the screen decides how it looks, how quiet it is and how easy it is to live with. There are three common routes:
- Full enclosure. The screen is tensioned inside a padded frame that also catches stray shots. A coordinated option with side and overhead protection, provided it is correctly specified and installed.
- Framed screen only. A dedicated frame without full side and top padding. Check how the exposed frame, sides and overhead area will be protected.
- DIY hanging. The screen is rigged with elastic or bungee cords onto your own frame. Can suit a custom installation, but requires a suitable frame, fixings, protection and correct tension.
A complete enclosure can simplify the choice of compatible components, while a custom installation may better suit some rooms. You can see complete kits in the Golf and Greens enclosure collection.
Image Quality: Screen and Projector Together
Plan the screen and projector together. Check the usable image dimensions, lens-to-screen distance, throw ratio and available mounting positions. Configure the projector and simulator output to the desired image format; this may differ from the projector’s native ratio.
Screen colour and surface also matter. Controlling ambient light in the room usually does more for image quality than any single screen spec. Browse compatible options in the Golf and Greens projectors collection and pair the throw ratio to your space.
Short-throw and standard-throw projectors can both suit a simulator, depending on the layout. A standard-throw model placed to the side or in a rear corner can sometimes fit better, if the distance and image-adjustment range allow it. Compare throw, zoom, lens shift, shadows and swing clearance case by case.
Care and Lifespan
An impact screen is a wear item. Use clean balls in good condition, inspect the fabric and fixings, and maintain the specified tension and clearances. Follow the manufacturer’s cleaning instructions. Lifespan varies with the material, number and speed of shots, ball condition and installation; layer count alone does not predict when replacement will be needed.
Match the Screen to Your Room
The right screen depends on the room it lives in and how you will use it. These three profiles cover most setups.
A limited footprint where screen dimensions, clearances and projector placement need to be planned together.
- Ratio matched to usable width and height
- Manufacturer-specified front and rear clearance
- Projector selected for the actual layout
A purpose-built space for regular, full-speed play, where durability and a clean golf image come first.
- 4:3, 16:10 or 16:9 to suit the room
- Material suited to intended use
- Full padded enclosure
A room that plays golf but also shows sport and films, so a wider, brighter image earns its place.
- 16:9 or 16:10
- Higher-brightness projector
- Ambient light control
How to Choose: A Simple Framework
Work through these in order and the right screen almost picks itself.
- Confirm your room and enclosure. Measure width, depth and height using our room size guide.
- Pick the aspect ratio. Choose the proportions from the usable width, height and desired image, then confirm projector and software support.
- Choose the material. Compare the actual fabric, intended use, projection surface and mounting requirements.
- Check the distance. Confirm ball-to-screen distance and the free space required behind the screen.
- Decide how to mount it. Full enclosure, framed screen or DIY, based on budget and finish.
- Pair the projector. Match throw ratio and aspect ratio to the screen and the room.
Common Impact Screen Mistakes
The enclosure and room set the screen size. Measure the space first, then choose a screen that fits with a margin.
Drum-tight screens bounce the ball back harder, make more noise and tear sooner. Aim for firm with a little give.
Follow the recommended ball-to-screen distance and preserve the required free space behind the screen. Neither clearance should be sacrificed to fit a smaller room.
Check the configured output and usable image area before ordering. A different native projector ratio can work, but an unsuitable configuration may leave unused areas or crop the picture.
Ordinary projector screens are not impact-rated and will tear fast. Only use a purpose-built golf impact screen.
Frequently Asked Questions
What material are golf impact screens made of?
Most use woven or knitted synthetic fabric in a single- or multi-layer construction. Performance depends on the actual material and mounting, not layer count alone. Compare the model’s intended use, projection surface and installation instructions.
Is 4:3 or 16:9 better for a golf simulator?
Neither is universally better. At equal width, 4:3 is taller; 16:9 provides a wider shape, with 16:10 between them. All can suit golf. Choose according to the available width and height, and check the projector and software can deliver the desired image format.
How far should I stand from the impact screen?
Use the distance specified for the exact screen and setup. Separately, preserve enough free space behind the screen for it to deflect without hitting a wall or rigid object. Correct tension and protection around the frame also matter.
How long does an impact screen last?
Lifespan varies with fabric construction, ball speed, frequency of use, ball condition and installation. Follow the care instructions and inspect the impact area and fixings regularly. There is no single lifespan that applies to every screen.
Can I use a normal projector screen as an impact screen?
No. Ordinary projector screens are not built to take repeated ball strikes and will tear quickly. You need a purpose-built golf impact screen designed to absorb impact while still displaying a clear image.
Do I need an enclosure, or can I just hang the screen?
Either can work when correctly designed and installed. A full enclosure provides a coordinated structure and surrounding protection. A framed or custom hanging installation still needs suitable fixings, rear clearance and protection around the sides, top and exposed frame.
Choose Your Impact Screen with Golf and Greens
The right impact screen depends on your room, your projector and how hard and often you play. Golf and Greens helps golfers across Europe choose and install screens and enclosures that stay quiet, durable and sharp, shot after shot. Our team can help you determine:
- The fabric construction suited to your ball speed and usage
- The screen format and compatible projector and software settings
- The right screen size for your enclosure and room
- The required front and rear clearances and suitable mounting method
Compare the range, plan your full setup, or talk it through with a simulator specialist.
Choose the screen for your room, your ball speed and your projector, not the lowest price.
Leave a comment